Sewing the last item for my project 333 summer capsule wardrobe

Sewing the last item for my project 333 summer capsule wardrobe


This is my last make for my Project 333 summer capsule wardrobe. Tomorrow you’ll get to see all 33 pieces.

I used the pattern from my Sew Serendipity book. I love this book- the great way of mixing fabrics and I adore the finishing touches to the garments. I made the same version skirt as last time. I’ve shown it here with the purple vest top I’ll be using in my capsule.

I decided that I wanted to tie in the fabrics a bit more. On the last skirt I did this based on the embellishments described in the book plus one of my own design. This time I wanted to pull some of the pattern from the top of the skirt into the bottom section. I found a swirl stamp that had been free with the June 2012 issue of craft stamper magazine that made a good match for the swirl in the middle of the flower pattern. It was a grungy swirl by artistic stamper.
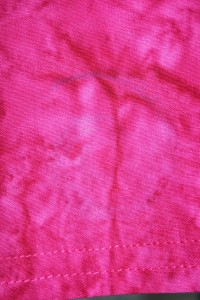
I have several methods of stamping on fabrics. I usually make a colour swatch of the various inks I have. This time the colour Celadon in my Versacraft ink pads gave me the best match to the aqua colour swirl in my flower fabric. I then stamped my pattern around the bottom section of my skirt using my bar stamping gear. I made my skirt first and marked the centre front and back at the bottom with a water-soluble pen. I then used the bar to stamp the swirl at set intervals. The pictures also show the top stitching. I do feel this makes it seem a bit more professional. What do you think?

Very difficult to get the swirl to show up in photos!

That is my last make for my summer project 333 capsule wardrobe. Tomorrow you’ll get to see all the project 333 items (just as I put them away and get out my Autumn project 333 capsule!!)
Here are the links for all the posts in the series so far

Other posts in my sewing for summer project 333 capsule wardrobe series

Drafting my first pattern- project 333 summer capsule wardrobe

Drafting my first pattern- project 333 summer capsule wardrobe

The reason I have been teaching myself to sew is because I want to simplify my wardrobe by having fewer clothes but making sure they fit and I love them. As I’ve been teaching myself I’ve been mainly using patterns. This has helped me to get a grasp of some of the techniques and the order to sew garments but unfortunately with many of them I’m still not that happy with the fit. However, I’m now getting to the stage where I’m getting happier adapting patterns for a better fit (although still making a fair amount of mistakes!!).

One of the key items I like to wear in winter is a satin wiggle skirt. I want to make some more wiggle skirts in different fabrics. Rather than make these from a pattern and then adapt to fit I thought I would try copying a skirt I have which fits!! Since I haven’t done this before I bought
Patternmaking for a Perfect Fit and followed the instructions on patterning a skirt.

I bought a large piece of foam core board (I use this quite a lot around the house and in crafting projects!), bulldog clips and some brown paper from my stash.

I used the detailed instructions in the book and since I’m not an expert I’ll just summarise here.
I cut the paper to the length of the foam board and secured it with the bulldog clips so it was taut. You start by drawing an L shape to line up the skirt on. I folded the skirt front in half and lined up the centre front and bottom of the skirt on the lines. I then pinned it out taut and used pins to mark out the side, waist and dart positions. I then used a pencil to sketch these onto the paper using the pin marks and a Curve Ruler tool where appropriate to make sure I got the right line.

I did the same with the skirt back but added the position of the pleat at the back and of the zip opening etc.

The next stage is to adjust for the darts by measuring and marking the depth and length of the darts. I then added the additional fabric needed to the side and used my curve tool to redraw the top of the side.

I used my go to sewing guide- The Sewing Book


together with a thorough examination of the skirt I was copying to figure out how I would create the pleat.

Then I added fabric for the seam allowances.

In the book the skirt has a waistband but I wanted to copy my skirt that doesn’t. Mine has facings instead. I used my pattern pieces to trace patterns for the facings (I also made a pattern for linings since I plan on making winter versions of the skirt). The final stage is to mark up the pattern pieces and add notches etc.

Then the moment of truth was to make the skirt…..and it fit really well. The best fitting garment I’ve made! I didn’t do the best job of putting it on the mannequin and taking a photo but you get the idea!!

This is the pleat at the back of the skirt…..wonky photo day…it is straight!

Having put in a few zips using various instructions and You Tube videos I think I’ve finally come up with a way that works for me.

So a pattern for a wiggle skirt I can reuse for a great fit and a new summer skirt for my capsule wardrobe.

Other posts in my sewing for project 333 series

Skirt 4

Sewing a Summer capsule wardrobe for project 333- skirt 1

Sewing a Summer capsule wardrobe for project 333- skirt 1

Having realised I had gaps in my summer capsule wardrobe for project 333 I had decided to use makower quilting cotton fabrics to make some items to plug these gaps. So far I’ve posted my first pair of shorts and top. Today it is time for my first skirt.
Once again I wanted to try the pattern from my Sew Serendipity book.


I loved the top I made from this book and the skirt also has lots of potential. Once again there are different versions you can make and it is perfect for matching fabrics.

I made slight alterations to the embellishments- I added the flower embellishment. I made this by using spare medallion fabric (the bottom band of the skirt) and cutting out various size circles using the pattern as a guide. I then sewed them together in the middle, added a bead to the top and attached a brooch pin to the back. Attaching it to the skirt with a brooch pin means I can remove it when washing but I can also use it with other outfits in my capsule wardrobe.

Once again I found the book very easy to follow and found the instructions gave a more proffesional looking finish than many of the others I have tried (again it suggests top and edgestitching and I really liked the way this looks). There are several variations of the skirt which I look forward to trying.

This is the skirt with the top I made.

Other posts on sewing my project 333 for Summer

Shorts 1
Top 1
Top 2

Skirt 4

Sewing for my capsule project 333 wardrobe- top 1

Sewing for my capsule project 333 wardrobe- top 1

Haveing identified various gaps in my Summer project 333 capsule wardrobe I’ve been sewing items to fill the gaps! I started of with a new pair of shorts. Today I wanted to show you my first make using the Sew Serendipity: Fresh and Pretty Designs to Make and Wear book.

I started with one of the tunic designs. The book gives you a basic design and then various options based on the design. I loved the way these designs allow you to mix and match fabrics in various ways. I used two makower quilting cottons and this means the top matches my new shorts and will fit in perfectly with my capsule.

As someone fairly new to sewing I loved the detailed instructions and the resultant finishes. Mant of the seams are top and/or edgestitched and I though this really took my garments to the next level- I feel they look a lot more professional with these types of finishes.
This is the band at the bottom of the tunic and the sleeves.


I bought a Snap-on 1/4-inch Seam Footfor my Elna. At only a fiver it has been so useful for producing neater topstitching and I used it on the bottom band of the tunic to get nice spacing!You butt the black guide up against the seam or hem and the sewing is then 1/4 inch from the guide.


A view at an angle shows it is quite fitted and hopefully you agree it looks good with the shorts!!

I haven’t done the best job of getting it on the dress form as my wrists were hurting at the time- it sits a little smoother on me.

Other posts in my sewing for summer project 333 series
Shorts 1
Skirt 1 
Top 2 

Skirt 4